Ridgid 21-Degree 3-1/2 in. Round-Head Framing Nailer Review (Model # R350RHF)
July 11, 2018 | by Aaron (email) |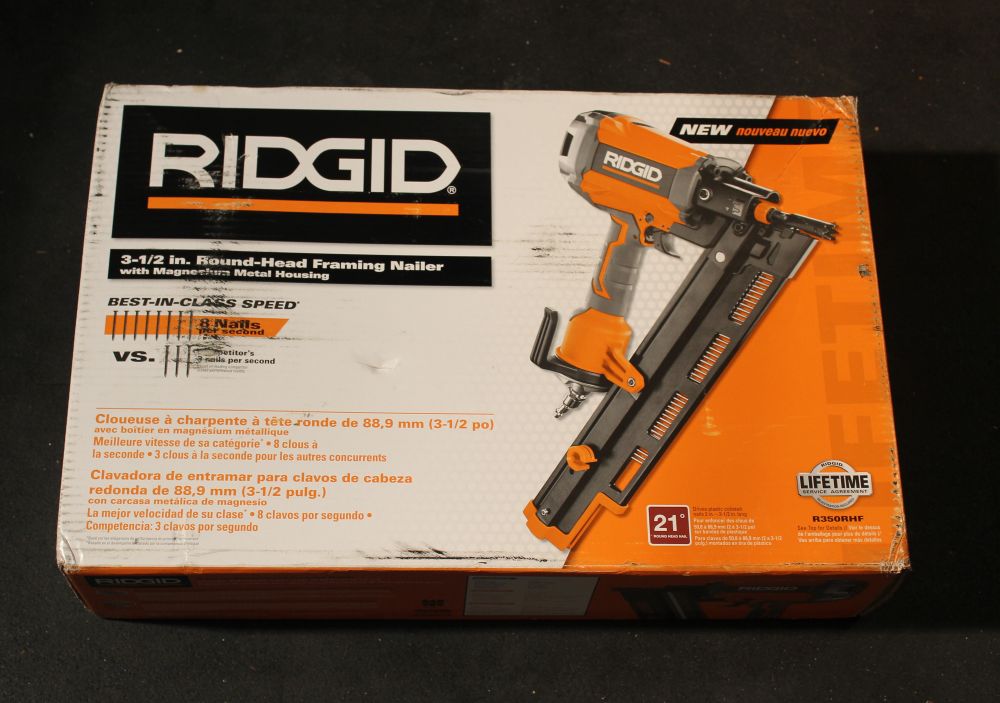
I’ve had a framer nailer on my short list of tools I’ve needed for a while, so I was excited when I got the opportunity to review Ridgid’s R350RHF offering available at the Home Depot. I have a basement remodel in the works and I already own several Ridgid tools, all of which I enjoy.
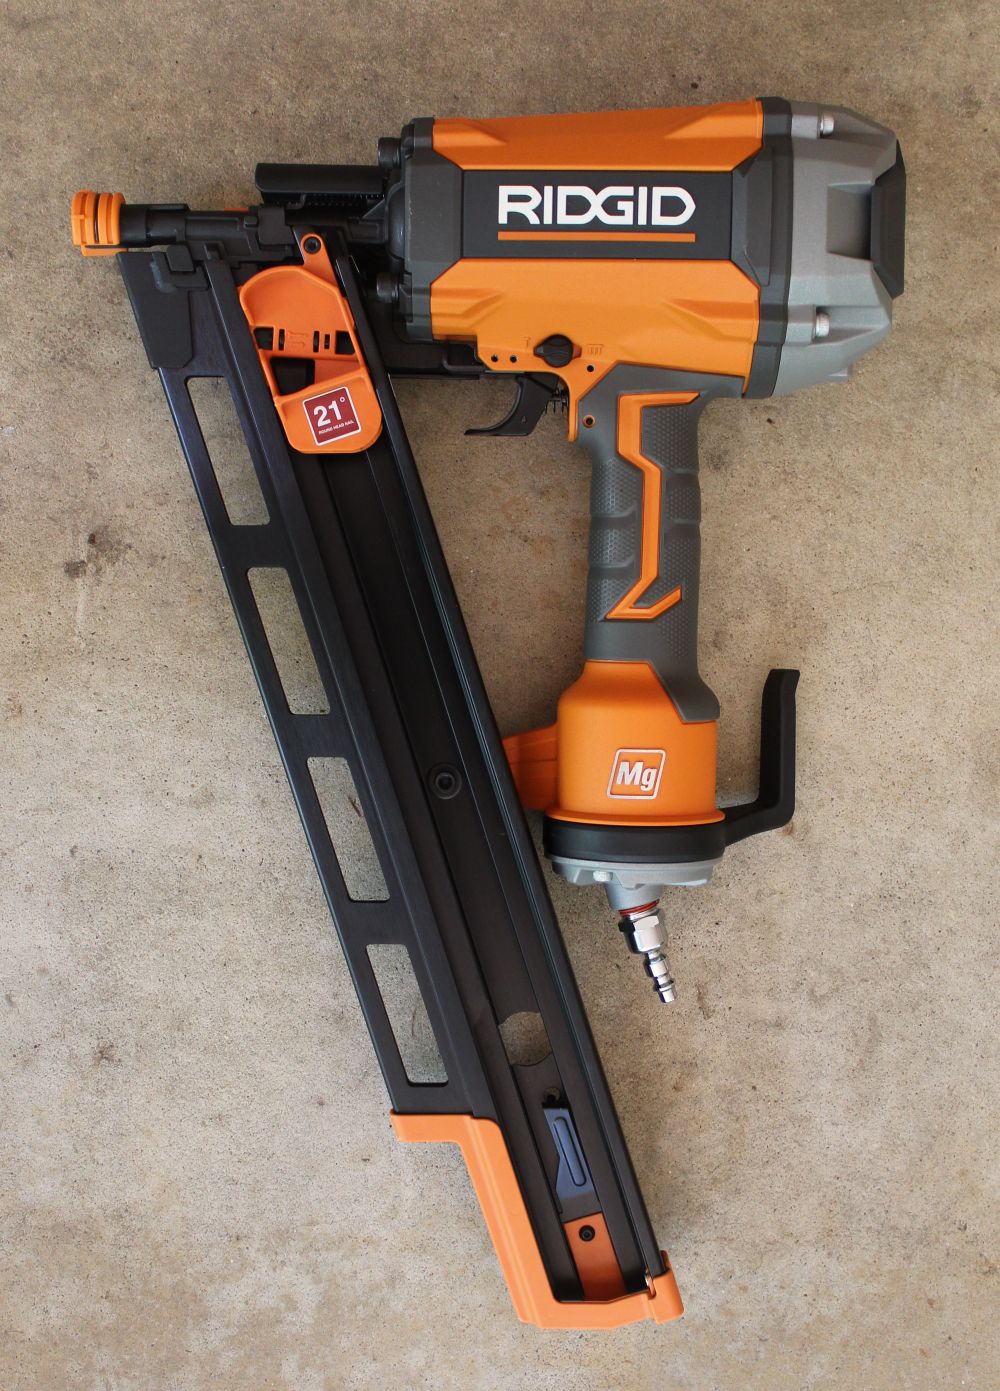
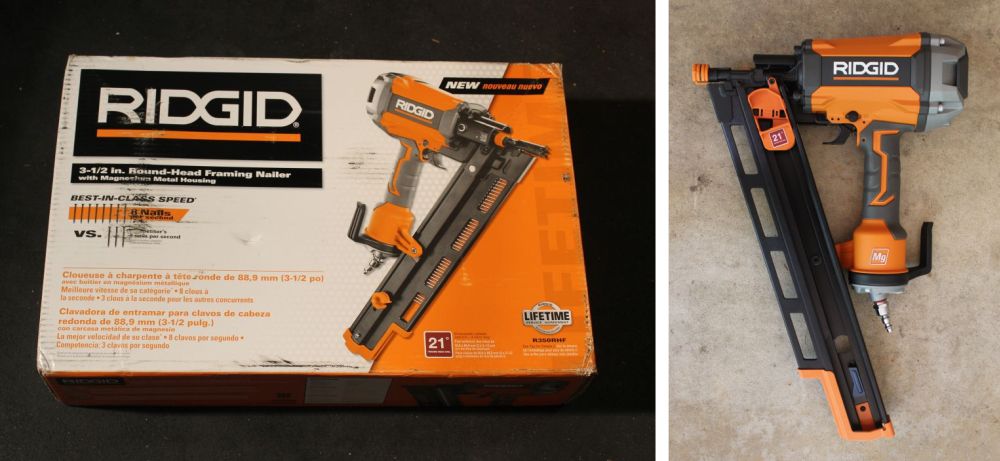
Ridgid R350RHF Round-Head Framing Nailer
Opening the box is half the fun of getting a new tool. Included in the box is a bottle of oil, an allen wrench (presumably for servicing the tool), paperwork, and of course the nailer itself. Right away this gun feels great in the hand and offers a solid grip with Ridgid’s rubber over-molded trigger and handle. There’s no getting around a pneumatic framing nailer being an inherently heavy tool. Nevertheless, Ridgid has done a nice job keeping the weight just under 8 lbs., while still maintaining a high standard of quality for all of the moving parts.
The R350RHF has many nice features that make it easy to use and adaptable to various situations one might encounter while framing.
- Swiveling pneumatic hose attachment
- Nail drive depth adjustment
- Toolless switching between fire modes
- 8 nails per second firing rate (when using fire-upon-contact mode)
- Dry-fire lockout
- Removeable no-mar nailing pad
- Swiveling tool belt hook
- 3 year warranty and lifetime service agreement
Setup and Loading
Getting the R350RHF ready for action takes minimal effort and time. The gun is designed for use with plastic collated 21 degree framing nails from 2″-3.5″ long. In the testing below I’m using 3 1/4″ nails as I could not find 3.5″ in stock. Loading the nails is as easy as orienting the nails at the proper angle, sliding them down the magazine, and pulling back on the magazine clip. I was able to load 2 clips of nails for a total of about 60 nails. I own a few brad nailers of various sizes and this is easily the smoothest loading nailer I own. I experienced zero binding when pulling back or releasing the clip and it never slipped while locking the nails in place.
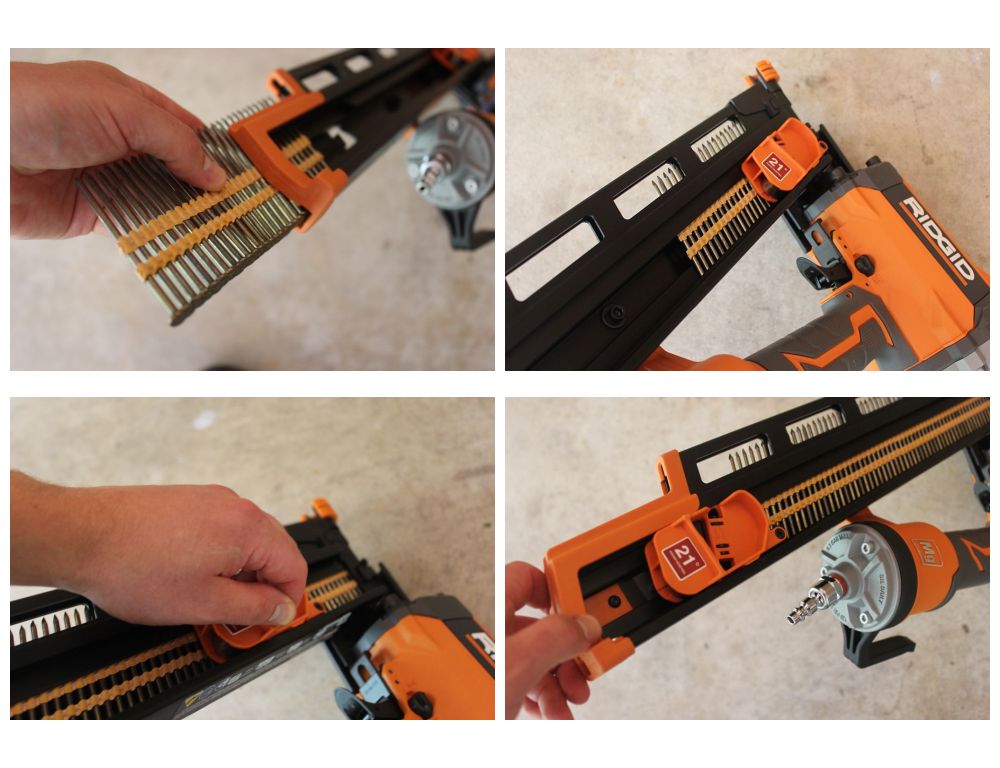
It’s important to note that this is not an oilless pneumatic gun. The instructions say to lightly oil with 2-3 drops of oil before every day of use. Or oil it periodically during a day of very heavy use.
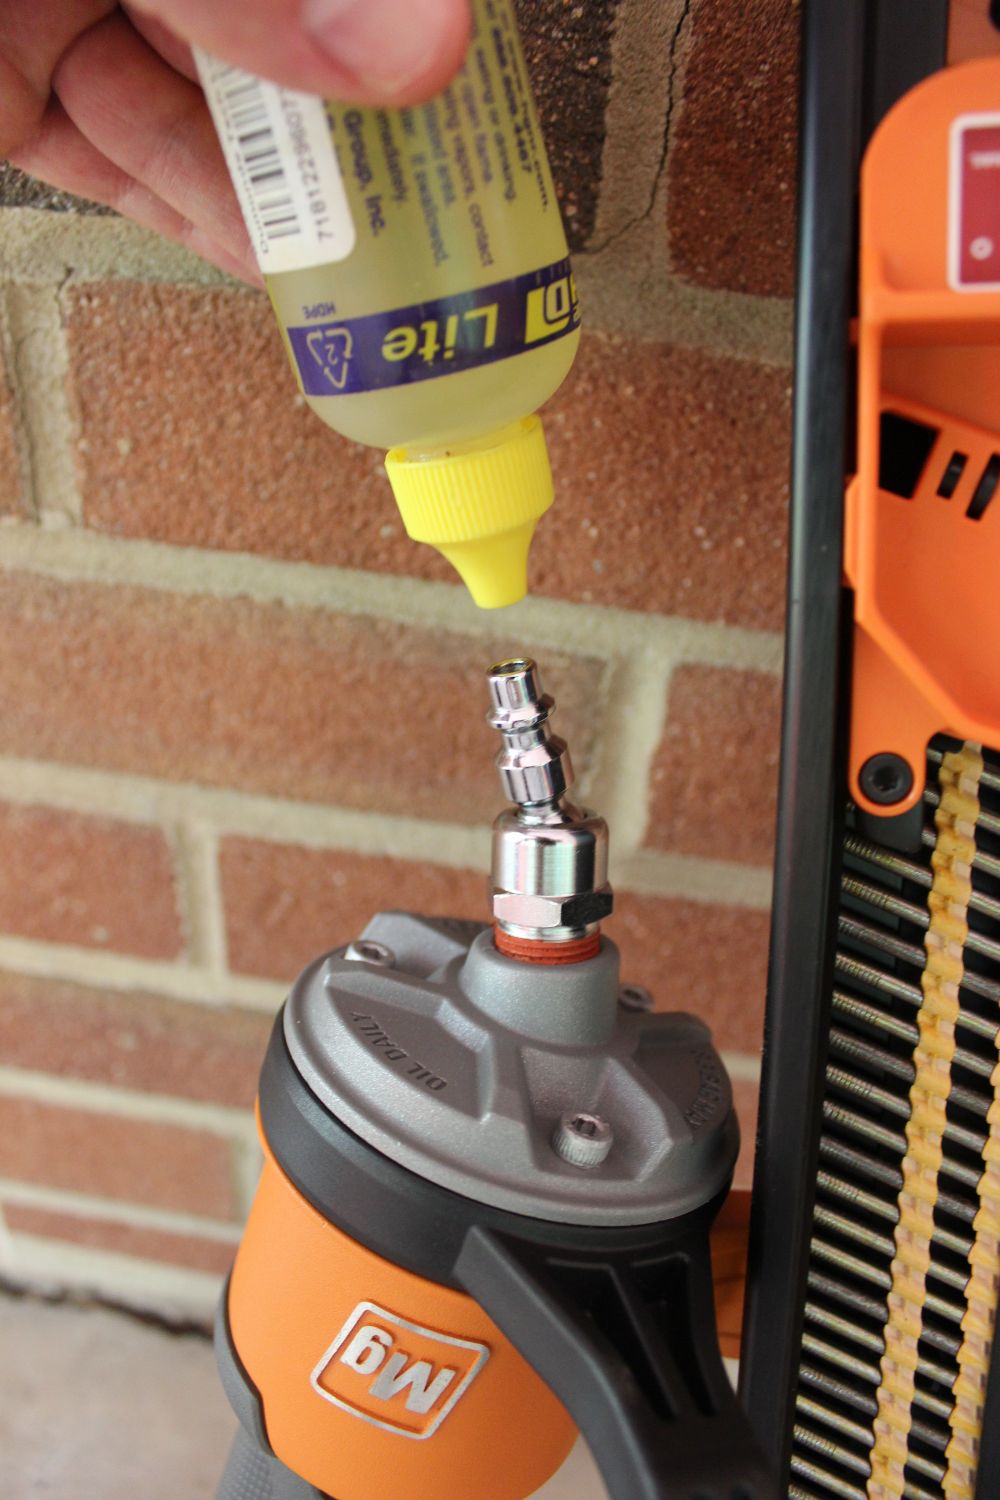
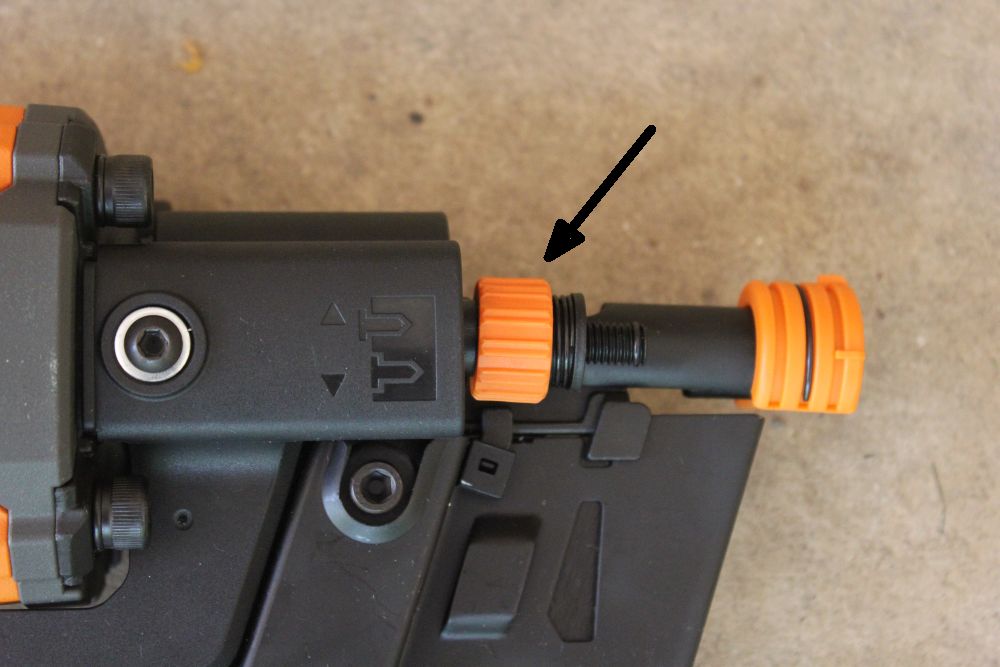
After I loaded the nails, I applied a few drops of oil into the end of the pneumatic fitting. Then I attached the air hose and set my compressor to the maximum recommended operating pressure of 120 psi to give the best chance of driving those long 3 1/4″ nails. As mentioned above the pneumatic fitting easily swivels to either side with a quick flick of the wrist. This allowed the hose to drape on either side of the tool and made switching hands and positions much less cumbersome.

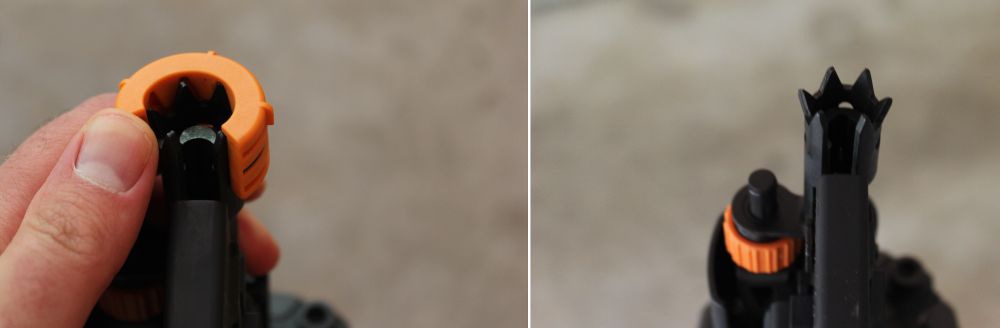
Nail Drive Depth Adjustment
The R350RHF comes with an adjustment knob that allows the user to fine-tune how far the nails are driven below the surface of the wood. I recommend testing a few nails using the same material you plan to use for your project to obtain the best results. It’s also important to mention that the compressor and pressure setting you use will also affect how far the nails are driven. In my testing below I’m using a small 6 gallon pancake style compressor set to 120 psi (the maximum recommended operating pressure). The adjustment knob is very easy to operate with only one hand. It is also clearly marked next to the knob which way to turn it to raise and lower the drive depth.
I tested the drive depth using some scraps of douglas fir I had removed from some walls I took out of my home and a few scraps of new studs I had recently purchased at my local Home Depot. Both samples were tested by stacking them 3 high and nailing through the face grain as one would when building a header. I adjusted the drive depth as far as it would go in both directions and drove a nail using each setting. I used the single-fire mode to ensure the most consistent results.
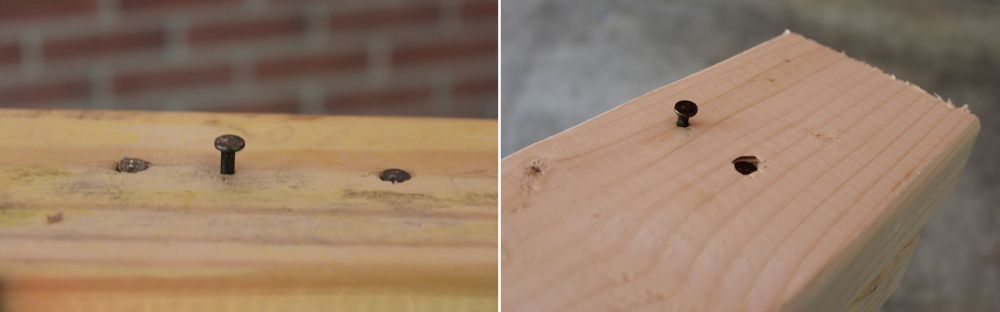
In the much older fir (pictured left) the nails set flush with the surface to a good 1/4″ above the surface. Not surprisingly, the nails drove further into the softer, newer pine (pictured right) that most people will be using for new projects. The nails drove from sub-flush to 3/16″ or so above the surface. After trying different settings throughout my other testing I found myself keeping the R350RHF set to full drive depth.
Switching Firing Modes
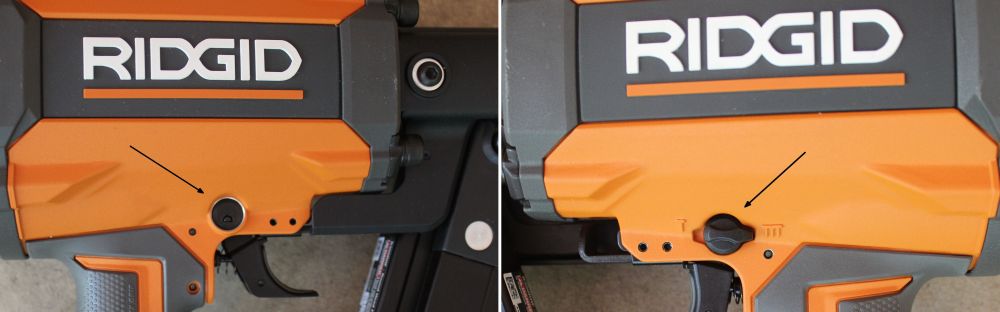
Another cool feature on the R350RHF is the ability to quickly switch between single-fire and rapid-fire modes. Single-fire mode requires the user to fully depress the head of the nailer onto the surface to be nailed before the trigger can be pulled. I would implore anyone who is not a professional to always use single-fire mode as it offers the safest and most accurate operation. Rapid-fire mode allows the user to keep the trigger held down and firmly tap the head of the nailer against the nailing surface repeatedly without the need to pull the trigger each time. Switching between modes is easiest with two hands and is accomplished by pushing the button above the trigger on the right side of the gun while turning the knob on the left side of the gun to point to the desired mode. Again, I found the action of the selection tool to be smooth and crisp.
Ridgid claims the R350RHF can shoot 8 nails per second in rapid-fire mode. I did my best to test this claim. However, I found myself lacking the necessary skills to fire more than 2 or 3 nails per second given there was some kickback when firing each nail that required me to refocus my aim. I suspect a professional framer with more ninja-like reflexes than myself will find this feature more useful than I did. During testing, I encountered the advertised dry-fire lockout, which left 5 nails unfired in the magazine. This protects the tool from damage that might potentially occur if it were to fire without a fastener.
No-Mar Nailing Pad
The Ridgid R350RHF comes with a useful no-mar nailing pad on the head of the gun for use on finished surfaces such as decking. When removed, a nailing claw is revealed, which gives a firm bite into the nailing surface. This is particularly useful to prevent slippage while toenailing. Though I built a small wall (see below) using the no-mar pad still attached, I would likely leave it removed for any rough framing projects in the future.
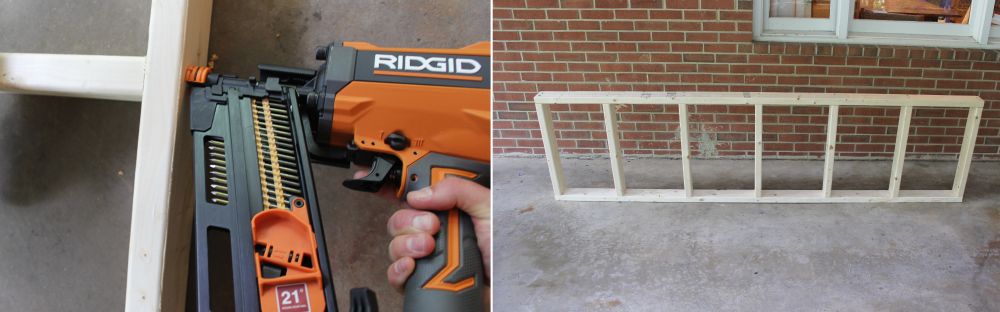
Let’s Build A Wall
I have an eventual need for a small “wall” as the framework of a countertop for part of my aforementioned basement remodel so I decided to put one together. I was curious to see how much time it would take to assemble. The “wall” in question is 8′ x 26″ when fully assembled. Once all of the pieces were cut and ready to assemble it took me just under 3 minutes to assemble the wall using the R359RHF nailer set to single-fire mode.
The Nitty Gritty
The Ridgid R350RHF is a solid buy for any avid DIYer or general contractor to add to their arsenal. At just $199 available exclusively through the Home Depot it’s competitively priced compared to its competitors and offers Ridgid’s excellent lifetime service agreement and 3 year limited warranty.